How to create google form?
1.Q:- How to create google form
Here's a step-by-step guide, including information on settings and design-
Step 1: Sign In to Google Account
Make sure you're signed in to your Google account. If you don't have one, you can create it for free.
Step 2: Access Google Forms
Open your web browser and go to [Google Forms](https://docs.google.com/forms). - Click the "+" (plus) sign icon to create a new form.
Step 3: Create a New Form
- A blank form will appear. You can give it a title by clicking on "Untitled form" at the top and entering a name.
Step 4: Adding Questions
- To add questions, click on the " + Add question" button.
- Choose the type of question you want, like multiple choice, short answer, or paragraph.
- Enter the question and options (if applicable).
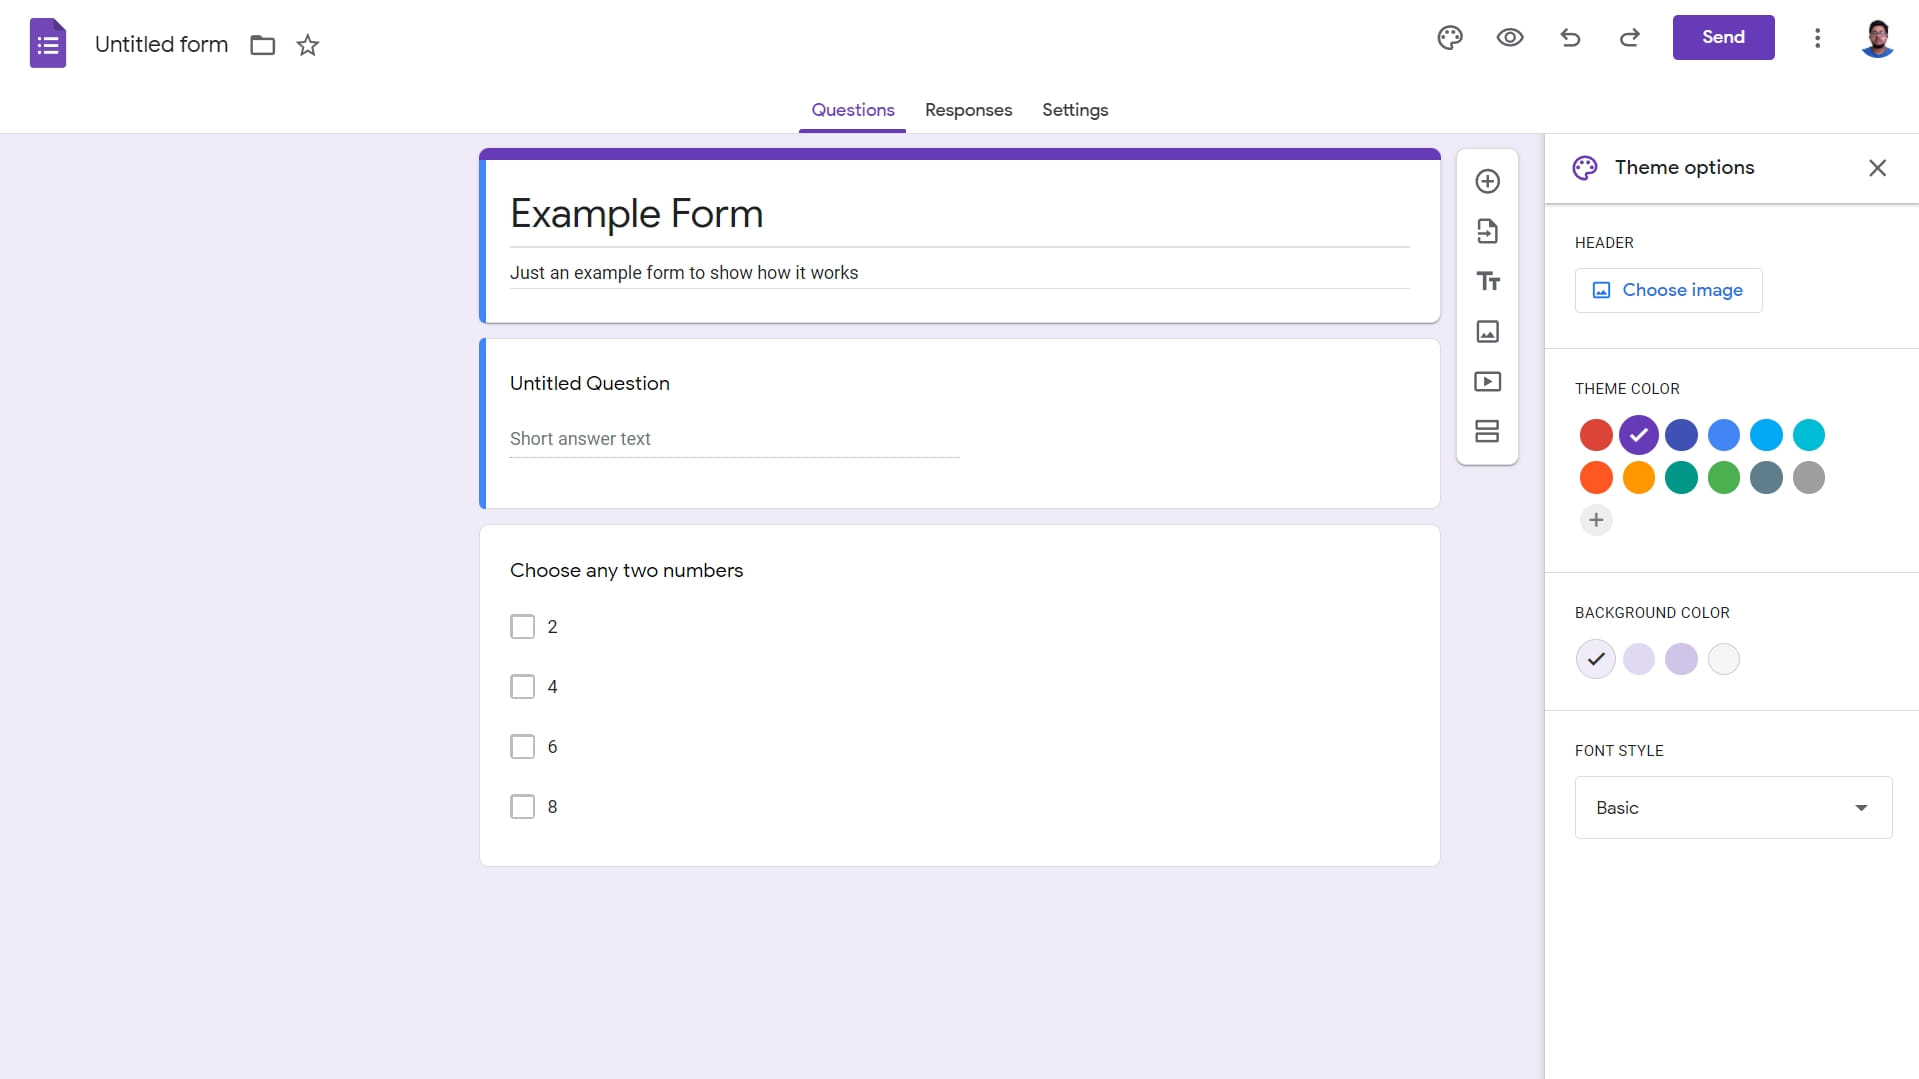
Step 5: Customizing Form Design
- Click the "Color Palette" icon at the top right to change the theme and colors.
- You can also add an image header by clicking the "Image" icon and upload your image.

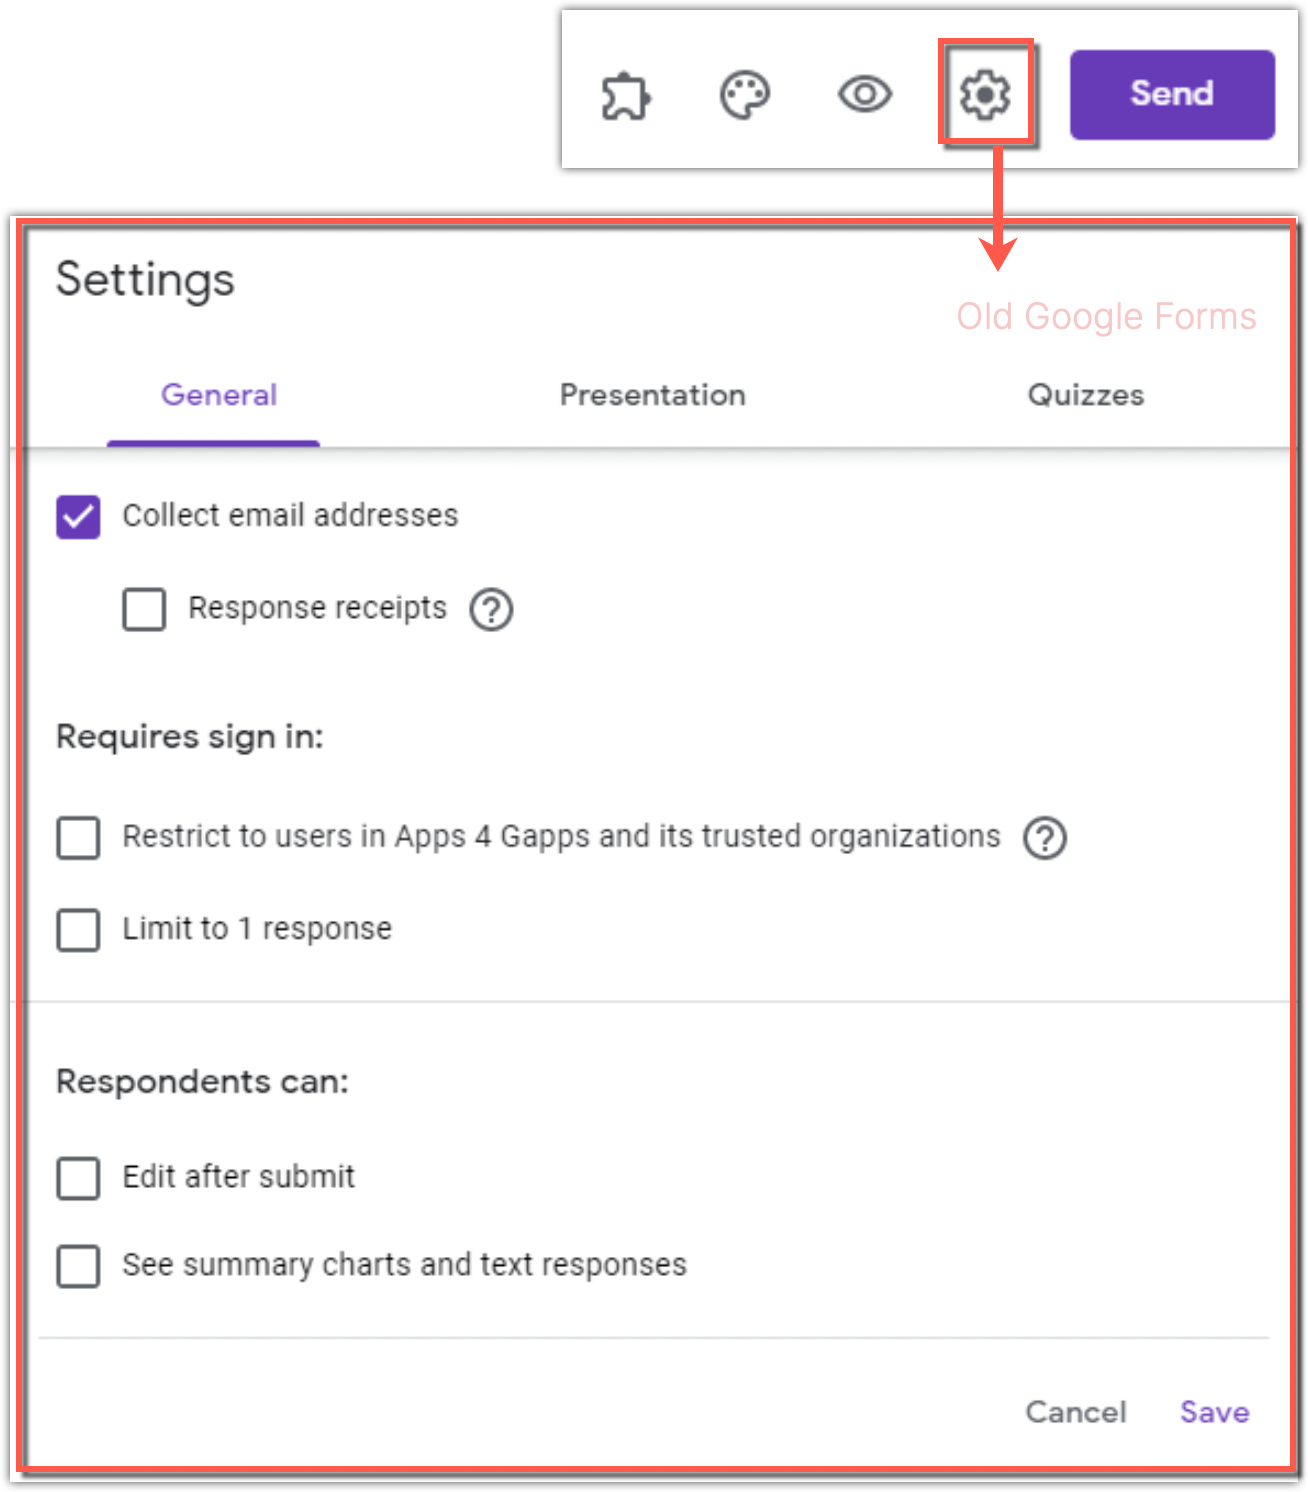
Step 6: Settings
- Click the "Settings" (gear) icon at the top right.
Form Settings:
- General: Set options like collecting email addresses or limiting responses.
- Presentation: Choose how questions are displayed, one at a time or all on one page.
- Quizzes: If your form is a quiz, enable this option and set grading criteria.
- Responses: Configure how responses are collected and view summary charts.
Step 7: Share Your Form
- Click the "Send" button at the top right.
- Choose to send via email, get a link to share, or embed the form on a website.
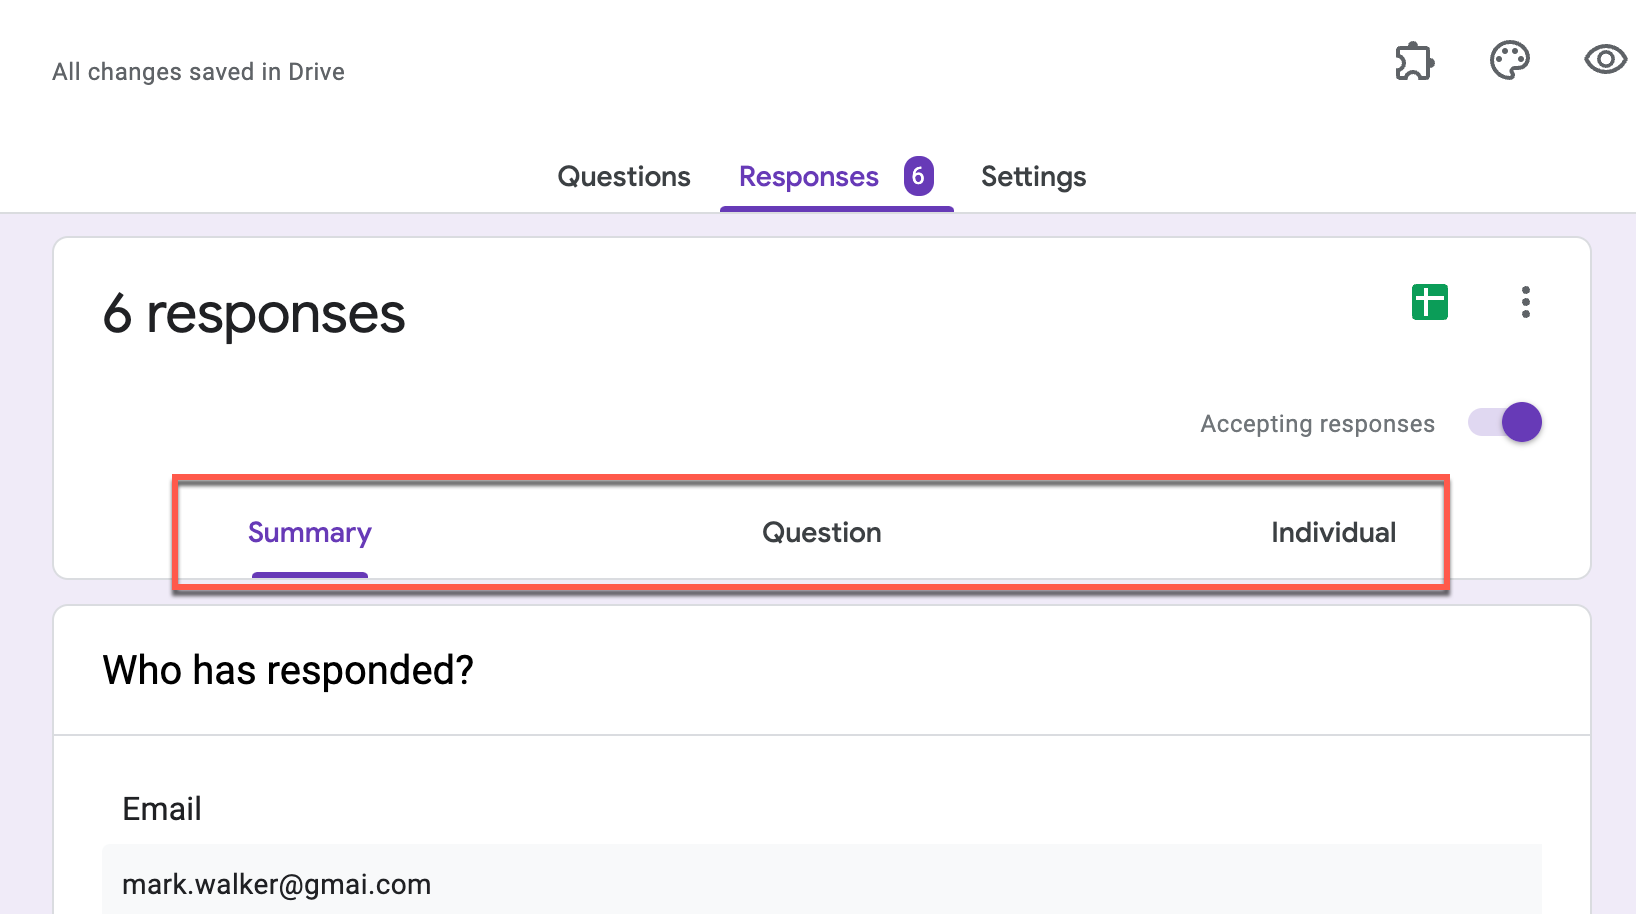
Step 8: Viewing Responses
- You can view responses by clicking on the "Responses" tab.
- You can also export responses to Google Sheets for further analysis.
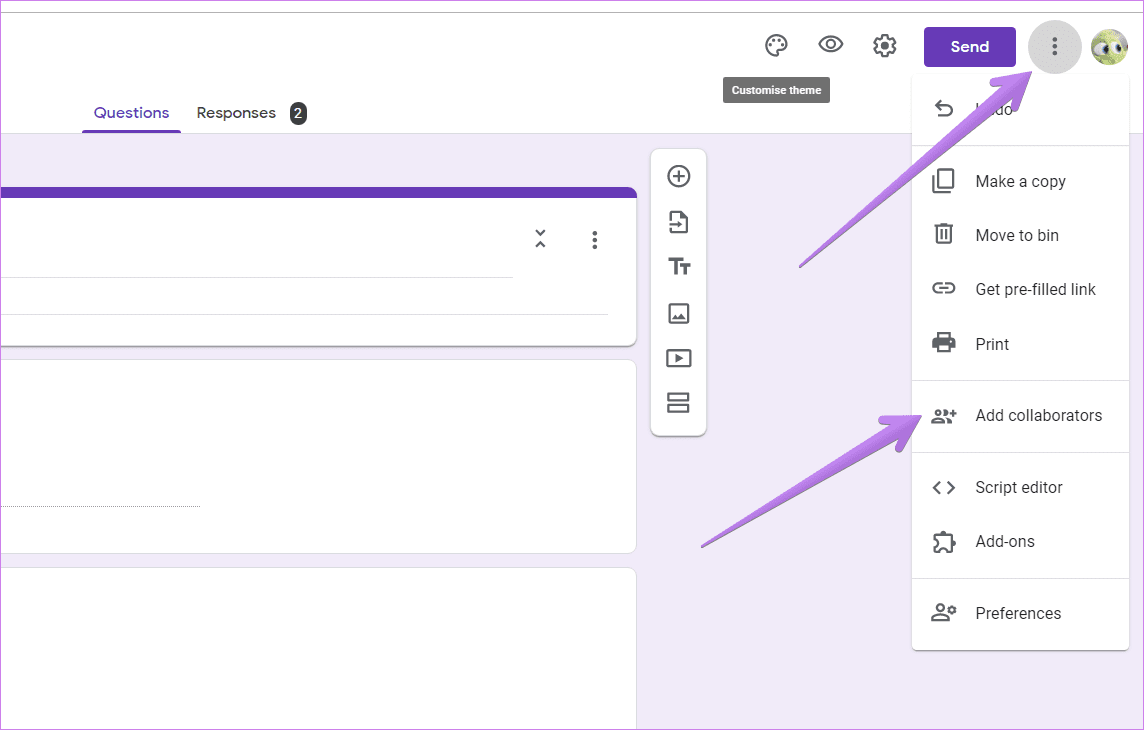
Step 9: Collaborate
- You can collaborate on the form with others by clicking the "Share" button in the top right. This allows multiple people to edit the form simultaneously.

- To add questions, click on the " + Add question" button. - Choose the type of question you want, like multiple choice, short answer, or paragraph. - Enter the question and options (if applicable).
Step 5: Customizing Form Design
- Click the "Color Palette" icon at the top right to change the theme and colors. - You can also add an image header by clicking the "Image" icon and upload your image.
Step 6: Settings
- Click the "Settings" (gear) icon at the top right.
Form Settings:
- General: Set options like collecting email addresses or limiting responses.
- Presentation: Choose how questions are displayed, one at a time or all on one page.
- Quizzes: If your form is a quiz, enable this option and set grading criteria.
- Responses: Configure how responses are collected and view summary charts.
Step 7: Share Your Form
- Click the "Send" button at the top right.
- Choose to send via email, get a link to share, or embed the form on a website.
Step 8: Viewing Responses
- You can view responses by clicking on the "Responses" tab.
- You can also export responses to Google Sheets for further analysis.
Step 9: Collaborate
- You can collaborate on the form with others by clicking the "Share" button in the top right. This allows multiple people to edit the form simultaneously.
- General: Set options like collecting email addresses or limiting responses. - Presentation: Choose how questions are displayed, one at a time or all on one page. - Quizzes: If your form is a quiz, enable this option and set grading criteria. - Responses: Configure how responses are collected and view summary charts.
Step 7: Share Your Form
- Click the "Send" button at the top right.
- Choose to send via email, get a link to share, or embed the form on a website.
Step 8: Viewing Responses
- You can view responses by clicking on the "Responses" tab.
- You can also export responses to Google Sheets for further analysis.
Step 9: Collaborate
- You can collaborate on the form with others by clicking the "Share" button in the top right. This allows multiple people to edit the form simultaneously.
Step 9: Collaborate
- You can collaborate on the form with others by clicking the "Share" button in the top right. This allows multiple people to edit the form simultaneously.
- You can collaborate on the form with others by clicking the "Share" button in the top right. This allows multiple people to edit the form simultaneously.
That's it, You've created a Google Form. Remember that Google Forms can be used for surveys, quizzes, data collection, and more. Customize the design and settings to suit your specific needs.

